Guide
Vertical Mouse Sensitivity Settings Guide (DPI 2026)
By James R., Ergonomics Specialist · Updated 2026-03-29
By Dr. Alex Chen · Last updated March 26, 2026
Set your vertical mouse DPI to 1200 as a starting baseline for a single monitor. Increase to 1600–2400 for dual monitors. Decrease to 800 for precision design work. Then disable mouse acceleration in your OS for consistent, predictable cursor movement. These three adjustments — DPI, acceleration off, OS sensitivity centered — take 5 minutes and transform how a vertical mouse feels from the first day.
A new vertical mouse feels wrong for two reasons. The first is the unfamiliar hand position — that takes 1–2 weeks to adapt to and there is no shortcut. The second is incorrect sensitivity settings — and that can be fixed in 5 minutes.
Most vertical mouse owners use whatever DPI their mouse shipped at, whatever OS sensitivity their computer defaulted to, and whatever acceleration setting was already enabled. The result: a cursor that moves too fast, too slow, or inconsistently — making the vertical mouse feel clumsy when the real problem is configuration.
This guide explains every sensitivity setting that affects your cursor, what to set each one to, and why. After reading, you will have a configured mouse that moves exactly where you expect it to.
DPI Explained (What It Actually Means)
The Simple Definition
DPI (dots per inch) is the number of screen pixels the cursor moves for every inch you move the mouse on your desk.
| DPI | What Happens When You Move the Mouse 1 Inch |
|---|---|
| 400 | Cursor moves 400 pixels |
| 800 | Cursor moves 800 pixels |
| 1200 | Cursor moves 1,200 pixels |
| 1600 | Cursor moves 1,600 pixels |
| 2400 | Cursor moves 2,400 pixels |
| 4000 | Cursor moves 4,000 pixels |
Higher DPI = faster cursor with less physical mouse movement. Lower DPI = slower cursor with more physical movement.
DPI vs CPI
CPI (counts per inch) is technically the correct term — optical sensors count position changes, they do not place dots. But the numbers are identical: 800 DPI = 800 CPI. Every manufacturer, reviewer, and user says "DPI." Use DPI. They mean the same thing.
DPI vs OS Sensitivity
Your actual cursor speed is determined by two factors multiplied together:
Cursor speed = Hardware DPI × OS sensitivity multiplier
If your mouse is set to 1200 DPI and your OS sensitivity is at the default midpoint (1x multiplier), the cursor moves 1,200 pixels per inch. If you increase the OS sensitivity to 1.5x, the effective cursor speed becomes 1,800 pixels per inch — even though the hardware DPI is unchanged.
The cleanest approach: set your hardware DPI to the right level for your task and keep the OS sensitivity at the default midpoint. This avoids the pixel-skipping and smoothing artifacts that OS sensitivity scaling can introduce.
Ideal DPI by Use Case
Office Work
| Task | Ideal DPI | Why |
|---|---|---|
| Email and web browsing | 1000–1400 | Links and buttons are large targets; comfortable arm movement range |
| Document editing | 1000–1400 | Text cursor placement needs moderate precision |
| Spreadsheets | 800–1200 | Cell selection requires more precision; slower = more accurate |
| Presentations | 1200–1600 | Mix of clicking UI elements and sweeping to slide controls |
| General multi-tasking | 1200 | Best all-around for single-monitor office work |
Creative and Design Work
| Task | Ideal DPI | Why |
|---|---|---|
| Photo editing | 400–800 | Precise masking, retouching, and selection tool placement |
| Vector graphic design | 400–800 | Anchor point placement requires pixel-level control |
| CAD / engineering | 600–1000 | Component placement and dimension lines need precision |
| Video editing (timeline) | 1000–1400 | Timeline scrubbing needs moderate speed; clip trimming needs precision |
| UI/UX design | 800–1200 | Balance between precise element placement and navigation |
Gaming
| Genre | Ideal DPI | Why |
|---|---|---|
| Strategy (Civilization, StarCraft) | 800–1200 | Unit selection and map navigation; precision for small units |
| MMO (WoW, FFXIV) | 800–1200 | Ability bar clicking; cursor needs to hit small UI buttons |
| Casual / puzzle | 1000–1400 | Comfort over precision; relaxed play |
| FPS (casual) | 400–800 | Aiming precision; lower DPI = more control per movement |
| FPS (competitive) | 400–800 | Most pro FPS players use 400–800 DPI with large mouse pads |
Ideal DPI by Monitor Setup
Why Monitor Resolution and Count Matter
Higher-resolution monitors have more pixels. More pixels means the cursor has further to travel. A DPI that feels perfect on a 1080p monitor feels sluggish on a 4K monitor because there are 4x more pixels to cover.
Multiple monitors multiply the total pixel distance. Dual 1080p monitors have 3,840 pixels horizontally. A single 4K monitor has 3,840 pixels horizontally. Dual 4K monitors have 7,680 horizontal pixels — the cursor has a very long way to travel.
DPI Recommendations by Setup
| Monitor Setup | Total Horizontal Pixels | Recommended DPI | Movement Feel |
|---|---|---|---|
| Single 1080p (1920×1080) | 1,920 | 800–1200 | Moderate arm movement covers full width |
| Single 1440p (2560×1440) | 2,560 | 1000–1400 | Comfortable wrist + arm movement |
| Single 4K (3840×2160) | 3,840 | 1400–2000 | Wrist movement covers most of the screen |
| Dual 1080p | 3,840 | 1400–2000 | Same pixel width as single 4K |
| Dual 1440p | 5,120 | 1600–2400 | Larger arm sweep or higher DPI |
| Dual 4K | 7,680 | 2000–4000 | Maximum DPI range needed |
| Ultrawide 3440×1440 | 3,440 | 1200–1800 | Wide but single screen; moderate DPI |
| Super ultrawide 5120×1440 | 5,120 | 1600–2400 | Treat like dual monitors |
The Edge-to-Edge Test
The simplest way to find your ideal DPI: place your cursor on the left edge of your leftmost monitor. Move the mouse from the center of your mouse pad to the right edge — a comfortable arm movement, not a stretch. If the cursor reaches the right edge of your rightmost monitor, the DPI is correct. If it falls short, increase DPI. If it overshoots, decrease DPI.
DPI Settings by Vertical Mouse Model
Available DPI Options
| Mouse | DPI Options | How to Change | Software |
|---|---|---|---|
| Logitech MX Vertical | 400–4000 (any value) | Logi Options+ software | ✅ Full control |
| Anker Vertical Ergonomic Mouse | 800 / 1200 / 1600 | Physical button (below scroll wheel) | ❌ None |
| Evoluent VerticalMouse 4 | 800 / 1200 / 1800 / 2600 | Evoluent Mouse Manager software | ✅ Full control |
| ProtoArc EM01 | 800 / 1200 / 1600 / 2400 / 4000 | Physical button | ❌ Basic |
| iClever TM209G | 1000 / 1600 / 2400 | Physical button | ❌ None |
| J-Tech Digital V628 | 600 / 1000 / 1600 | Physical button | ❌ None |
| DXT Precision Mouse | 800 / 1200 / 1800 | Physical button | ❌ None |
Which Mice Limit Your Options
Mice with only 2–3 fixed DPI presets (Anker, J-Tech) may not include your ideal DPI. If none of the presets feel right, use the closest preset and adjust the OS sensitivity slider to fine-tune. This is less clean than hardware DPI adjustment but works for practical purposes.
The MX Vertical's advantage: Logi Options+ lets you set any DPI from 400 to 4000 in increments — you can dial in exactly 1,350 DPI if that is your sweet spot. This level of tuning is unavailable on mice without software.
Windows Sensitivity Settings
Finding the Settings
Windows 10/11: Settings → Bluetooth & Devices → Mouse → Additional Mouse Settings → Pointer Options tab
Key Settings
| Setting | Recommended | Why |
|---|---|---|
| Pointer speed slider | 6/11 (exact middle) | Middle position applies a 1x multiplier — no scaling; DPI = actual cursor speed |
| Enhance Pointer Precision | ❌ OFF | This is mouse acceleration — disable it for consistent cursor movement |
Why 6/11 Matters
The Windows pointer speed slider has 11 positions. Position 6 (the exact center) applies no scaling to the hardware DPI signal. Every other position either multiplies (faster) or divides (slower) the raw DPI, which can introduce pixel-skipping at high settings or pixel-doubling at low settings.
Set to 6/11 and use hardware DPI to control speed. This gives you the cleanest, most accurate cursor movement.
The Sensitivity Slider Multipliers
| Slider Position | Multiplier | Effect on 1200 DPI |
|---|---|---|
| 1/11 | 0.0625× | 75 effective DPI (unusably slow) |
| 3/11 | 0.25× | 300 effective DPI |
| 6/11 | 1.0× (no scaling) | 1,200 effective DPI (clean) |
| 8/11 | 1.5× | 1,800 effective DPI |
| 11/11 | 3.5× | 4,200 effective DPI (pixel skipping likely) |
macOS Sensitivity Settings
The Mac Problem
macOS applies mouse acceleration by default and does not provide a simple toggle to disable it. This makes vertical mice feel inconsistent on Mac — slow movements produce tiny cursor travel while fast movements produce large cursor jumps. The relationship between hand movement and cursor movement is not linear.
System Settings Adjustment
macOS Ventura and later: System Settings → Mouse → Tracking Speed
Set the Tracking Speed slider to approximately the middle position. This provides a reasonable base speed, but acceleration is still active.
Fixing Acceleration on Mac (LinearMouse)
The free app LinearMouse is the recommended solution for vertical mouse users on Mac:
| Step | Action |
|---|---|
| 1 | Download LinearMouse from linearmouse.app (free, open source) |
| 2 | Install and grant Accessibility permissions when prompted |
| 3 | Open LinearMouse preferences |
| 4 | Select your vertical mouse from the device list |
| 5 | Enable "Linear" cursor movement (disables acceleration) |
| 6 | Adjust the speed multiplier until the cursor feels natural |
| 7 | Test by moving the cursor slowly and quickly — both should produce proportional distance |
macOS Settings Summary
| Setting | Recommended | Where |
|---|---|---|
| Tracking Speed | Middle position | System Settings → Mouse |
| Natural Scrolling | Your preference (many disable for mice) | System Settings → Mouse |
| Acceleration | Disabled via LinearMouse | LinearMouse app |
| Speed multiplier | Adjust to taste in LinearMouse | LinearMouse app |
For Mac-specific vertical mouse recommendations, see our best vertical mouse for Mac guide.
Mouse Acceleration: Why to Disable It
What Acceleration Does
Mouse acceleration makes the cursor travel farther when you move the mouse quickly and shorter when you move slowly. The same 1-inch physical movement produces different pixel distances depending on speed.
| Movement Speed | Without Acceleration (Linear) | With Acceleration |
|---|---|---|
| Slow (1 in/sec) | 1,200 pixels | 400 pixels |
| Medium (3 in/sec) | 1,200 pixels | 1,200 pixels |
| Fast (6 in/sec) | 1,200 pixels | 3,000 pixels |
Why Acceleration Hurts Vertical Mouse Adaptation
When you switch to a vertical mouse, your brain needs to build new muscle memory for cursor positioning. This requires a consistent, predictable relationship between hand movement and cursor movement. Acceleration breaks this consistency — the same wrist movement produces different results depending on how quickly you execute it.
Disabling acceleration gives you a 1:1 linear relationship: move 1 inch, cursor moves X pixels, every single time, regardless of speed. Your brain can learn this relationship in 1–2 weeks. With acceleration, the relationship is variable — your brain is trying to learn a moving target.
When to Keep Acceleration ON
| Situation | Why Keep It |
|---|---|
| Single monitor, very low DPI, no ability to change DPI | Acceleration helps cover large distances without increasing base DPI |
| You have used acceleration for years and your muscle memory is built around it | Disabling may feel worse initially; adapt gradually |
| Laptop trackpad (not external mouse) | Trackpads benefit from acceleration due to small surface area |
Polling Rate Explained
What Polling Rate Is
Polling rate is how often the mouse reports its position to the computer, measured in Hz (times per second).
| Polling Rate | Report Interval | Cursor Updates Per Second |
|---|---|---|
| 125 Hz | Every 8 ms | 125 |
| 250 Hz | Every 4 ms | 250 |
| 500 Hz | Every 2 ms | 500 |
| 1000 Hz | Every 1 ms | 1,000 |
Polling Rate by Vertical Mouse
| Mouse | Polling Rate | Adjustable? |
|---|---|---|
| Logitech MX Vertical | 125 Hz | ❌ |
| Anker Vertical | 125 Hz | ❌ |
| Evoluent VM4 | 125 Hz | ❌ |
| ProtoArc EM01 | 125 Hz | ❌ |
| iClever TM209G | 125 Hz | ❌ |
All mainstream vertical mice operate at 125 Hz. This is a deliberate design choice — vertical mice are designed for office work and ergonomic relief, not competitive gaming.
Does 125 Hz Matter?
| Use Case | 125 Hz Adequate? | Why |
|---|---|---|
| Office work | ✅ Yes | Human click-to-action is 150–300 ms; 8 ms polling is invisible |
| Web browsing | ✅ Yes | No perceptible difference from higher rates |
| Design work | ✅ Yes | Cursor position updates are fast enough for precise placement |
| Casual gaming | ✅ Yes | Non-competitive gaming does not require sub-8ms response |
| Competitive FPS | ❌ No | Competitive players need 500–1000 Hz for smooth tracking at high speed |
If you need a higher polling rate, you need a gaming mouse — not a vertical mouse. Vertical mice trade polling rate for ergonomic design. For ergonomic gaming setups, see our ergonomic mouse buying guide.
Dialing In Your Perfect Settings
The 5-Minute Setup Process
| Step | Action | Time |
|---|---|---|
| 1 | Set hardware DPI to your use-case recommendation (see tables above) | 30 sec |
| 2 | Set OS sensitivity to default midpoint (Windows: 6/11; macOS: middle slider) | 30 sec |
| 3 | Disable acceleration (Windows: uncheck "Enhance Pointer Precision"; Mac: install LinearMouse) | 2 min |
| 4 | Run the edge-to-edge test (cursor should reach all screen edges with comfortable movement) | 30 sec |
| 5 | Fine-tune DPI up or down one step if the edge-to-edge test fails | 30 sec |
Quick Presets by Profile
| Profile | DPI | OS Sensitivity | Acceleration |
|---|---|---|---|
| Single monitor office | 1200 | Default (6/11 or middle) | Off |
| Dual monitor office | 1600–2000 | Default | Off |
| Graphic designer | 800 | Default | Off |
| Spreadsheet power user | 1000 | Default | Off |
| Multi-monitor + precision | 1200 (with DPI switch to 800 for detail work) | Default | Off |
| Mac user (any task) | 1200–1600 | Middle + LinearMouse | Off (LinearMouse) |
Using DPI Switching During the Day
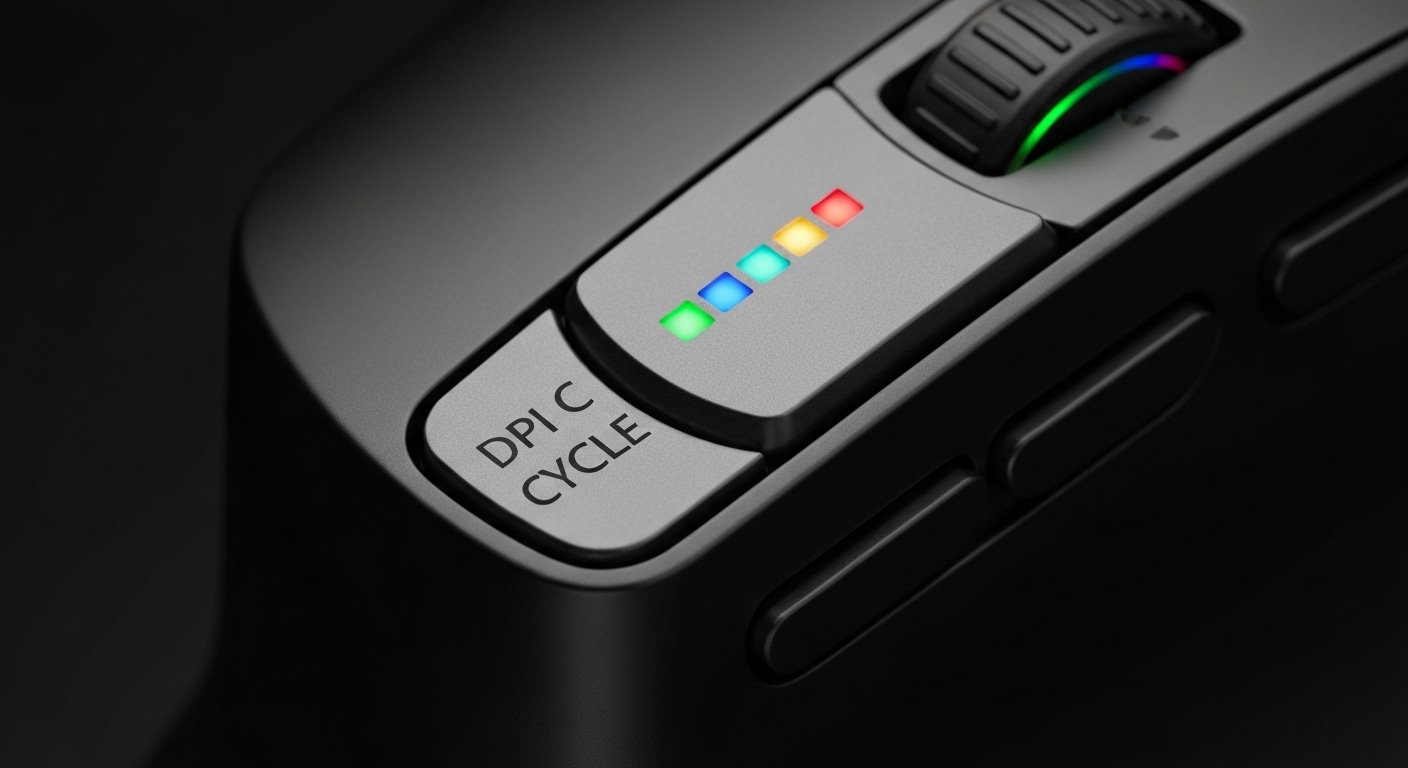
Many vertical mice have a physical DPI button. Use it to shift DPI based on your current task:
| Task Switch | DPI Change | How |
|---|---|---|
| Email → spreadsheet | 1200 → 800 | Press DPI button once |
| Spreadsheet → web browsing | 800 → 1200 | Press DPI button once |
| Single monitor → external dual monitors | 1200 → 1600 | Press DPI button to highest setting |
| General use → photo editing | 1200 → 800 | Press DPI button down |
This takes 1 second and becomes automatic after a few days. You will reach for the DPI button instinctively when switching tasks.
Frequently Asked Questions
What DPI should I set?
1200 for single-monitor office work. 1600–2400 for dual monitors. 800 for precision design work. Start at 1200 and adjust based on the edge-to-edge test.
What is the difference between DPI and CPI?
Nothing practical. DPI and CPI describe the same measurement: pixels moved per inch of mouse movement. DPI is the common term. They are interchangeable.
Why does my vertical mouse feel too fast or too slow?
DPI may not match your monitor resolution, OS sensitivity may be scaled, or acceleration is enabled. Set DPI to match your setup, OS sensitivity to default midpoint, and disable acceleration.
Should I disable mouse acceleration?
Yes — for consistent, predictable cursor movement, especially during vertical mouse adaptation. Acceleration makes the same movement produce different results based on speed, which hinders muscle memory development.
What polling rate do I need?
125 Hz is sufficient for everything except competitive gaming. All mainstream vertical mice operate at 125 Hz. If you need higher, you need a gaming mouse.
How do I change DPI?
Physical DPI button (most mice): press to cycle presets. Software (MX Vertical, Evoluent): set any value in the companion app. No button or software: use the OS sensitivity slider.
Do vertical mice have lower DPI than regular mice?
Yes — 1600–4000 max versus gaming mice at 8000–25000+. This does not matter for office use or general computing. DPI above 2000–3000 is unnecessary for non-gaming tasks.
Best settings for Mac?
Set hardware DPI to 1200–1600, macOS Tracking Speed to middle, and install LinearMouse (free) to disable acceleration and set a linear cursor speed. This transforms the Mac vertical mouse experience.
Sources & Methodology
This guide explains mouse sensitivity settings and provides DPI recommendations based on monitor resolution, task requirements, and input device physics.
Technical References:
- DPI/CPI: optical sensor measurement — counts per inch of physical movement, mapped to pixels on screen
- Polling rate: USB HID report rate — frequency of position updates from mouse to computer
- Windows pointer speed slider: 11-position multiplier; position 6 = 1.0× (no scaling) — documented in Microsoft input device specifications
- macOS mouse acceleration: default cursor acceleration curve; LinearMouse provides linear (non-accelerated) alternative
Ergonomic References:
- OSHA: Computer Workstation eTool — mouse positioning and movement range — osha.gov
- Comfortable mouse movement range: cursor should reach all screen edges with forearm movement that does not extend the shoulder or require wrist flicking
Methodology notes:
- DPI recommendations are based on monitor pixel dimensions and comfortable forearm movement range (~4–6 inches for edge-to-edge cursor travel)
- "Ideal DPI" is a starting point — individual preference varies based on hand size, desk space, and movement habit
- The edge-to-edge test is a practical calibration method, not a clinical standard
- Polling rate comparisons assume standard USB HID polling; some gaming mice use custom protocols
- This guide covers standard vertical mouse sensitivity configuration; gaming-specific tuning has different priorities
- We may earn a commission on purchases at no additional cost to you; affiliate relationships do not influence recommendations
Internal links referenced: